RECOMMENDED EQUIPMENT
LISTED BELOW ARE MY RECOMMENDED REQUIREMENTS FOR YOUR DENTAL PHOTOGRAPHY KIT.
If you want the ease and convenience of a kit set up for you and taking consistent images everytime right out of the case then see https://www.dentalphotographyinpractice.com/product-category/kits/
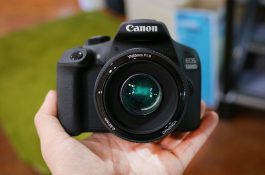
The market leaders are of course Canon and Nikon. However any DSLR will perform well, though suitable accessories may be limiting or expensive compared with Canon and Nikon.
If your budget is tight then cameras such as the Canon 800D (now discontinued but i can still get stock)or Nikon D5600 (discontinued but I can still get stock) for use in your practice are fine, just not as robust as more expensive options…..see products page for updated lists of Canon and Nikon cameras.
Next level up are generally more robust heavier and pricier.
Beyond this are cameras that, for general photography give some additional benefits, but for dental photography can be a little bigger and heavier.
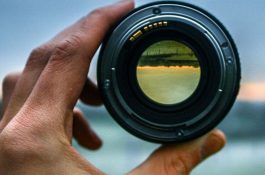
For consistent dental photography you need a ‘prime’ macro lens i.e. not a zoom lens. The reason for this is that with a ‘prime’ macro lens and manual focus, you can accurately set the ‘magnification factor’ typically 1:3 and get consistent magnifications each time regardless who is taking the image, important when recoding for instance, tooth wear or soft tissue lesions.
The other factor to bear in mind is working distance. A 60mm lens will mean you are closer to the subject for intra oral shots and can be difficult to get the high close up views, as you will be too close to the patient. Whereas a 100mm macro lens will bring you to a more comfortable distance. Downside of 100mm is if you have a small surgery you will find extra oral shots of your patient difficult, as you will need a working distance of a good 1.5 metres.
I would suggest for Canon and Nikon the Sigma 105 macro lens, Canon have stopped producing their standard 100mm macro lens and now only have the expensive 100mm L series lens at present. The sigma and Tamron only stop down to f22, which isn’t a problem.
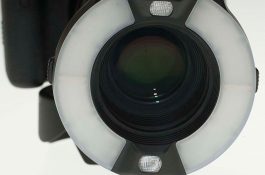
Ring flash is the best option, especially for beginners. It gives even consistent illumination. There are lots of options available of varying cost from about £75 upwards to the expensive Canon ring flash now selling at well over £700.
New Canon models 2000D and 4000D do not synch with third party flashes such as the Nissin Meike , Kenro and Yongnuo, Fl;ashes such as the Nissin Kenro and Meike will synch with other models check with me on mike@mikesharland.com.
LED lights are not suitable as they will not give sufficient illumination to use the settings I suggest later in this article.
Be careful as some LED lights will be listed as a flash, when it is just the LEDs flashing. If you are not sure email me, mike@mikesharland.com, with a link to the product and I should be able to advise you.
When you really get into your photography and want to go to the next level then you might want to consider ‘twin flashes’, these are great for anterior shots but posterior shots can present a problem getting shadow free shots.
An important note, which will become clear when we get onto optimum settings, is that your flash should be used in ‘Manual’ mode..
RETRACTORS/MIRRORS/CONTRASTER CHOICE
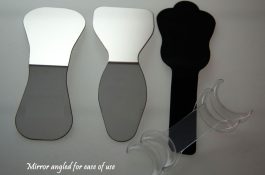
Good quality retractors/mirrors and contrasters are essential to help get the images you require.
Self retaining retractors would not be my recommendation as they don’t give you control over your retraction.
Mirrors whether glass or metal should have some form of handle to keep fingers out of the picture. Generally all mirrors will scratch, but scratches on a metal mirror, unless severe, tend to show up less.


